


add uni email to iphone,Add Uni Email to iPhone: A Comprehensive Guide

Add Uni Email to iPhone: A Comprehensive Guide
Adding your university email to your iPhone is a crucial step for staying connected with your academic community. Whether you need to receive important notifications, submit assignments, or simply keep in touch with your professors, having your uni email readily accessible on your device is essential. In this detailed guide, we will walk you through the process of adding your university email to your iPhone, covering various aspects such as setting up an account, configuring email settings, and troubleshooting common issues.
Setting Up Your University Email Account

Before you can add your university email to your iPhone, you need to ensure that you have an active account. Here’s how to set up your university email account:
- Go to your university’s website and navigate to the email login page.
- Enter your username and password to log in.
- Follow the instructions provided by your university to set up your email account. This may include verifying your account, setting up a password, and configuring your email preferences.
- Once your account is set up, make sure to save your login credentials securely.
Adding Your University Email to iPhone
Now that you have your university email account set up, let’s move on to adding it to your iPhone:
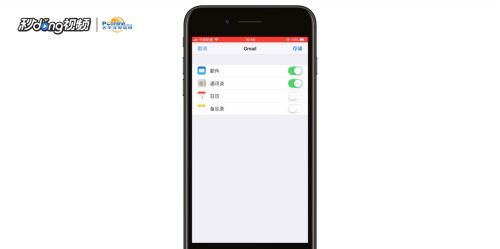
- Open the “Settings” app on your iPhone.
- Scroll down and tap on “Mail.” This will open the Mail settings.
- Tap on “Accounts” to view a list of all your email accounts.
- Tap on “Add Account” to add a new email account.
- Select “Outlook” from the list of email providers.
- Enter your university email address and password.
- Tap on “Next” to proceed.
- Follow the on-screen instructions to configure your email settings. This may include entering your university’s incoming and outgoing server settings.
- Once your email account is set up, you will see it listed under “Accounts.” Tap on it to configure additional settings, such as notifications, signature, and email format.
Configuring Email Settings
After adding your university email to your iPhone, you may want to configure some additional settings to ensure a seamless experience:
- Under the “Accounts” section, tap on your university email account.
- Scroll down and tap on “Advanced.” This will open the advanced email settings.
- Under the “Outgoing Mail Server” section, make sure the “SMTP” server is enabled.
- Enter your university’s SMTP server address and port number.
- Enter your username and password to authenticate with the SMTP server.
- Under the “Incoming Mail Server” section, make sure the “IMAP” server is enabled.
- Enter your university’s IMAP server address and port number.
- Enter your username and password to authenticate with the IMAP server.
- Tap on “Done” to save your settings.
Troubleshooting Common Issues
While adding your university email to your iPhone, you may encounter some common issues. Here are some troubleshooting steps to help you resolve them:
- Make sure you have entered the correct email address and password.
- Check if your university’s email server is experiencing any outages or maintenance.
- Ensure that your iPhone’s date and time are accurate.
- Clear your iPhone’s cache and restart the device.
- Update your iPhone’s software to the latest version.
- Contact your university’s IT support for assistance.
By following these steps, you should be able to successfully add your university email to your iPhone and enjoy seamless communication with your academic community.
| Step | Description |
|---|---|
| 1 | Open the “Settings” app on your iPhone. |
| 2 | Scroll down and tap on “Mail.” This will open the Mail settings. |


