


how to tie a uni knot line to line,How to Tie a Uni Knot Line to Line: A Detailed Guide

How to Tie a Uni Knot Line to Line: A Detailed Guide
Whether you’re a beginner or an experienced knot tyer, learning how to tie a uni knot line to line is a valuable skill. This versatile knot is known for its strength and ease of use, making it a popular choice for various applications, such as fishing, boating, and camping. In this article, we’ll walk you through the steps to tie a uni knot line to line, providing you with a comprehensive guide to help you master this knot.
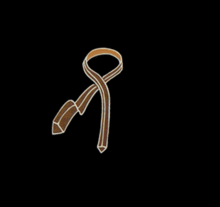
Understanding the Uni Knot

The uni knot, also known as the fisherman’s knot, is a simple yet effective knot that can be tied with two lines of equal or unequal thickness. It’s known for its ability to maintain a strong connection between the two lines, even under tension. The uni knot is also easy to untie, which is a significant advantage over some other knots.
Materials Needed
Before you begin, gather the following materials:
| Material | Description |
|---|---|
| Two lines | One line should be slightly longer than the other. The lines can be made of various materials, such as nylon, monofilament, or braided line. |
| Clippers | Used to trim the excess line after the knot is tied. |
Step-by-Step Instructions

Follow these steps to tie a uni knot line to line:
-
Take the longer line and fold it in half, creating a loop. Pass the end of the longer line through the loop, then pull it tight to form a loop with a bight in the middle.
-
Take the shorter line and pass it through the loop created in step 1, from the back to the front. This will create a second loop with a bight in the middle.
-
Pass the end of the longer line through the second loop, from the back to the front. This will create a third loop with a bight in the middle.
-
Pass the end of the shorter line through the third loop, from the back to the front. This will create a fourth loop with a bight in the middle.
-
Pass the end of the longer line through the fourth loop, from the back to the front. This will create a fifth loop with a bight in the middle.
-
Pass the end of the shorter line through the fifth loop, from the back to the front. This will create a sixth loop with a bight in the middle.
-
Pass the end of the longer line through the sixth loop, from the back to the front. This will create a seventh loop with a bight in the middle.
-
Pass the end of the shorter line through the seventh loop, from the back to the front. This will create an eighth loop with a bight in the middle.
-
Pass the end of the longer line through the eighth loop, from the back to the front. This will create a ninth loop with a bight in the middle.
-
Pass the end of the shorter line through the ninth loop, from the back to the front. This will create a tenth loop with a bight in the middle.
-
Pass the end of the longer line through the tenth loop, from the back to the front. This will create an eleventh loop with a bight in the middle.
-
Pass the end of the shorter line through the eleventh loop, from the back to the front. This will create a twelfth loop with a bight in the middle.
-
Pass the end of the longer line through the twelfth loop, from the back to the front. This will create a thirteenth loop with a bight in the middle.
-
Pass the end of the shorter line through the thirteenth loop, from the back to the front. This will create a fourteenth loop with a bight in the middle.
-
Pass the end of


