


how to tie a uni knot with braided line,How to Tie a Uni Knot with Braided Line

How to Tie a Uni Knot with Braided Line
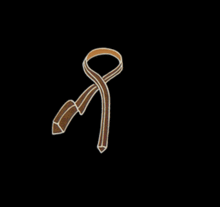
Whether you’re a seasoned angler or a beginner looking to improve your knot-tying skills, mastering the uni knot with braided line is a valuable addition to your fishing arsenal. The uni knot, also known as the improved clinch knot, is a versatile and strong knot that works well with braided fishing lines. In this detailed guide, I’ll walk you through the steps to tie a uni knot with braided line, ensuring you have a reliable connection every time.
Understanding the Uni Knot

The uni knot is a popular choice for anglers due to its simplicity and strength. It’s designed to create a secure loop that can withstand heavy loads, making it ideal for fishing with braided line. Braided lines are known for their high strength and sensitivity, but they can be more challenging to tie knots with. The uni knot, however, is up to the task.
Materials Needed
Before you start, gather the following materials:
| Item | Description |
|---|---|
| Braided Line | Choose a braided line that suits your fishing needs. The thickness of the line will depend on the species you’re targeting and the conditions you’re fishing in. |
| Loop Bait or Leader | Optional, but recommended for attaching lures or leaders to the knot. |
| Water | Use to wet the knot during the tying process. |
Step-by-Step Instructions
Follow these steps to tie a uni knot with braided line:
-
Take about 12-15 inches of braided line and fold it in half to create a loop. The loop should be about 4-6 inches long.
-
Pass the end of the line through the loop, creating a second loop. The second loop should be about 2-3 inches long.
-
Take the end of the line and pass it through the first loop, creating a third loop. The third loop should be about 1-2 inches long.
-
Now, take the end of the line and pass it through the second loop, creating a fourth loop. The fourth loop should be about 1-2 inches long.
-
Pass the end of the line through the first loop, creating a fifth loop. The fifth loop should be about 1-2 inches long.
-
Take the end of the line and pass it through the fourth loop, creating a sixth loop. The sixth loop should be about 1-2 inches long.
-
Pass the end of the line through the fifth loop, creating a seventh loop. The seventh loop should be about 1-2 inches long.
-
Now, take the end of the line and pass it through the sixth loop, creating an eighth loop. The eighth loop should be about 1-2 inches long.
-
Pass the end of the line through the seventh loop, creating a ninth loop. The ninth loop should be about 1-2 inches long.
-
Take the end of the line and pass it through the eighth loop, creating a tenth loop. The tenth loop should be about 1-2 inches long.
-
Pass the end of the line through the ninth loop, creating an eleventh loop. The eleventh loop should be about 1-2 inches long.
-
Take the end of the line and pass it through the tenth loop, creating a twelfth loop. The twelfth loop should be about 1-2 inches long.
-
Pass the end of the line through the eleventh loop, creating a thirteenth loop. The thirteenth loop should be about 1-2 inches long.
-
Take the end of the line and pass it through the twelfth loop, creating a fourteenth loop. The fourteenth loop should be about 1-2 inches long.


