


Tying the uni knot easy,Tying the Uni Knot Easy

Tying the Uni Knot Easy
Have you ever found yourself struggling to tie a perfect uni knot? Whether you’re a beginner or just looking to refine your skills, mastering the uni knot is a valuable addition to your knot-tying repertoire. In this detailed guide, I’ll walk you through the process step by step, ensuring that you can tie a uni knot with ease and confidence.
Understanding the Uni Knot

The uni knot, also known as the fisherman’s knot, is a versatile and strong knot that is excellent for joining two ropes of different diameters. It’s commonly used in boating, fishing, and other outdoor activities where a reliable connection is crucial.
Here’s a quick overview of the uni knot’s structure:
| Part of the Knot | Description |
|---|---|
| Body | The main part of the knot, which wraps around the two ropes to be joined. |
| Tag End | The end of the rope that is used to tie the knot. |
| Standing Part | The part of the rope that remains stationary during the tying process. |
Materials Needed

Before you start, gather the following materials:
- Two ropes of different diameters (at least 1.5 feet each)
- A flat, stable surface to work on
- A pair of scissors
Step-by-Step Instructions
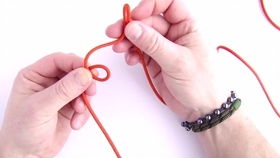
Follow these steps to tie a uni knot:
-
Take one rope (the larger one) and lay it on a flat surface. Place the other rope (the smaller one) on top of it, with the tag end facing away from you.
-
Take the tag end of the smaller rope and wrap it around the larger rope, passing it under the larger rope and over the tag end.
-
Now, take the tag end and wrap it around the larger rope again, passing it over the tag end and under the larger rope.
-
Repeat step 3, wrapping the tag end around the larger rope and passing it over the tag end and under the larger rope.
-
Once you’ve made three wraps, take the tag end and pass it through the loop formed by the last wrap.
-
Moisten the knot with saliva or water to help it tighten.
-
Grasp the knot and pull on both the standing part and the tag end to tighten the knot. Make sure the knot is snug but not too tight.
-
Trim the tag end to about 1/4 inch from the knot to prevent fraying.
Common Mistakes to Avoid
Here are some common mistakes to avoid when tying a uni knot:
-
Not moistening the knot: This can make it difficult to tighten the knot properly.
-
Over-tightening the knot: This can cause the knot to become weak and prone to failure.
-
Not making enough wraps: The uni knot requires at least three wraps to be strong and reliable.
Practical Applications
The uni knot has a wide range of practical applications, including:
-
Joining two ropes of different diameters in boating and fishing.
-
Securing a rope to a tree or post.
-
Creating a loop in a rope for various purposes, such as hanging a lantern or attaching a tarp.
Conclusion
Tying a uni knot is a valuable skill that can be useful in various situations. By following this detailed guide, you should now be able to tie a uni knot with ease and confidence. Remember to practice regularly to improve your technique and become more proficient at this versatile knot.


