


how to add uni timetable to iphone calendar,How to Add Uni Timetable to iPhone Calendar

How to Add Uni Timetable to iPhone Calendar
Managing your university schedule can be a daunting task, especially when you have multiple classes, assignments, and extracurricular activities to keep track of. One of the most efficient ways to stay organized is by syncing your uni timetable with your iPhone calendar. This guide will walk you through the process step by step, ensuring that you never miss an important event again.
Step 1: Access Your Uni Timetable

Before you can add your uni timetable to your iPhone calendar, you need to have access to it. Most universities provide their students with an online timetable that can be accessed through a web browser or a dedicated mobile app. Here鈥檚 how you can find and access your uni timetable:
- Log in to your university鈥檚 student portal or website.
- Look for a section labeled 鈥淭imetable鈥?or 鈥淪chedule鈥?
- Click on the timetable link to view your classes and events.
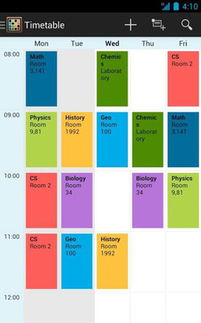
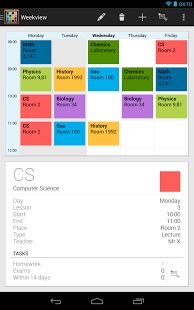
Once you have accessed your uni timetable, take note of the following information for each class or event:
- Class name or event title
- Day of the week
- Start and end time
- Location (if applicable)
Step 2: Create a New Calendar on Your iPhone
Now that you have your uni timetable information, it鈥檚 time to create a new calendar on your iPhone to store your schedule. Here鈥檚 how to do it:
- Open the 鈥淐alendar鈥?app on your iPhone.
- Tap the 鈥淐alendars鈥?button at the bottom left corner of the screen.
- Tap the 鈥?鈥?button at the top right corner to create a new calendar.
- Enter a name for your uni timetable calendar, such as 鈥淯niversity Schedule鈥?
- Tap 鈥淪ave鈥?to create the calendar.
Step 3: Add Events to Your iPhone Calendar
With your new uni timetable calendar created, it鈥檚 time to add your classes and events to it. Here鈥檚 how to do it:
- Go back to the main calendar view.
- Tap the 鈥?鈥?button at the bottom right corner to create a new event.
- Enter the class name or event title in the 鈥淭itle鈥?field.
- Select the appropriate calendar (your uni timetable calendar) from the 鈥淐alendar鈥?dropdown menu.
- Enter the start and end time for the event.
- Optional: Add a location for the event (if applicable).
- Tap 鈥淪ave鈥?to add the event to your calendar.
Repeat this process for each class or event in your uni timetable. You can also set reminders for each event to ensure you don鈥檛 miss it.
Step 4: Sync Your iPhone Calendar with Other Devices
One of the great advantages of using the iPhone calendar is the ability to sync your schedule across multiple devices. This means you can access your uni timetable from your iPhone, iPad, Mac, or even a Windows PC. Here鈥檚 how to sync your iPhone calendar:
- Open the 鈥淐alendar鈥?app on your iPhone.
- Tap the 鈥淐alendars鈥?button at the bottom left corner of the screen.
- Tap the 鈥渋鈥?icon next to your uni timetable calendar.
- Scroll down and tap 鈥渋Cloud.鈥?/li>
- Make sure the 鈥渋Cloud鈥?switch is turned on.
Once your calendar is synced with iCloud, you can access it from other devices by logging in to your iCloud account. Simply open the 鈥淐alendar鈥?app on the other device and log in with your Apple ID.
Step 5: Customize Your Uni Timetable Calendar
Now that you have your uni timetable in your iPhone calendar, you can customize it to suit your preferences. Here are some tips to help you get started:
- Change the calendar color to make it stand out.
- Set event alerts and reminders to ensure you never miss a class.
- Use the 鈥淩epeat鈥?feature to automatically add recurring events, such as weekly classes.
- Group similar events together to keep your calendar organized.


